

Isabella did not want to take it off or have her photo taken ?
This version was no sew, but it should be sewn around the bottom and leg edges?The sweater is from Fashion Bug and is a blend of 72% Acrylic, 23% Nylon and 3% Spandex. I suppose the spandex is what is helping keep the shape?
First, I laid out the sweater on my cutting mat and made sure the design that was on the arm (cable look), was center for her back. In this case the arm seam matched up perfectly, just by laying the arm seam directly in the middle under the design.
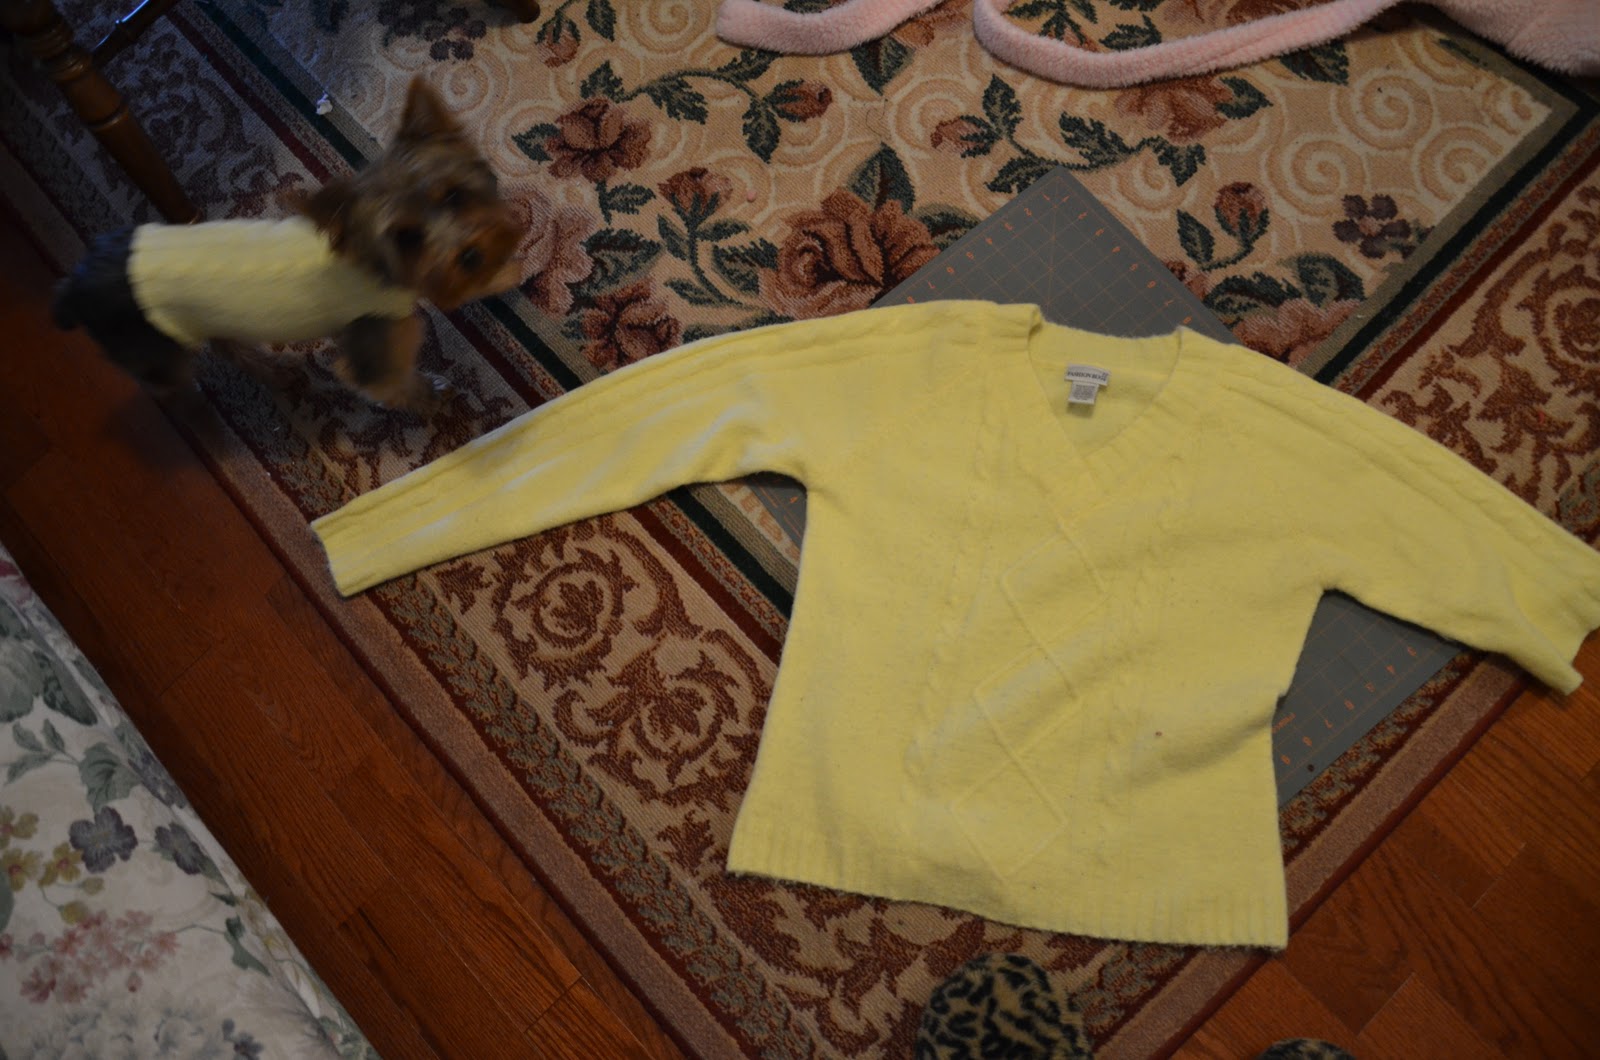

Instant sweater, this project took less than a half hour to finish, but Isabella really cooperated :) Didn't she do a great job walking right onto the sweater. I couldn't have made her do that in a million years. In case you don't know it, Isabella has her own mind and attitude :)
Well, this was my first project and tutorial (if you call it that?). I hope I didn't make it seem too complicated?
I joining in the parties at :
Savvy Southern Style for the Boring to Better Party,with Kim as our gracious hostess click here http://savvysouthernstyle.blogspot.com/2011/01/color-change-to-chest-and-boring-to.html
Not Just A Housewife for Show Me What You Got, please visit her and the other party goers. at http://happyhappyhousewife.blogspot.com/2011/01/show-me-what-ya-got-8.html
Thanks for visiting and come back again.
Chrissy
Hi! I'm here from Not Just a Housewife. This is super cute, and I'm sure Isabella loved it! I'm a new blogger, I signed up to follow you, I'd love if you'd stop by and maybe return the favor.
ReplyDeleteThis is really cute! It helps having such an adorable dog. And a lot easier than the one I made! check it out here: http://takens-tidbits.blogspot.com/2010/12/dog-sweater-tutorial.html
ReplyDeleteChrissy if this isn't ever the ca-uuutest little sweater for Isabella I don't know what is. What a precious doll she is! I love the color too.
ReplyDeleteHappy day sweet friend.
Warmly, ~Melissa :)
Hi, Chrissy! Regarding your question, yes, the Swap Followings linky party will always be up every 5 pm on Mondays, PST. Thanks for following. I'm a follower, too. If you want to be seen by others, please link up, too; it's open til Friday :) Just whip up a quick post saying you're joining my party and include my party button and you're all set. See ya!
ReplyDeleteHey Chrissy, I wasn't able to respond back to your comment since it wasn't attached to an email. I used 100 paint chips, so 10 across and 10 down. I first got the chips, measured the short side, which was 3.25 and then cut the long side to the same measurement so it'd be a square. Then I figured out about how big I wanted the piece to be, and then just did some math so I wasn't going to have to make Home Depot cut some weird number, like 37 7/32 or something. So I wanted it to be about 35 inches or so, so I just did 3.25 times 10. So the final piece is 32.5 by 32.5. Make sense? It would just depend on how big your squares are originally. Hope this helps!
ReplyDeleteSooo cute! What a great use for a sweater that was no longer working for you! I love how your little pup walked right onto the sweater, too. The perfect model!
ReplyDeleteYour doggy sweater is precious! I am going to have to try that. Thank you for the tutorial.
ReplyDeleteThank you also for stopping by my blog and leaving a comment regarding my cabinets. The wall color is called Samovar Silver and is a Sherwin Williams paint. I originally found the color on an interior design site called Bear Hill Interiors. It is out of the box for a neutral girl like me, but I really like it!
Cute sweater! Yellow is definately her colour. I'm afraid I'd need to buy a rather large sweater to fit my little critter. It's not because she's a large breed dog, but rather because she's got a bit o' extra padding =)
ReplyDeleteYou are just too cute! What a great idea!
ReplyDeleteOh my gosh!
ReplyDeleteThat is too cute!!! I love it!! What a sweet little doggie!
Chrissy thanks for stopping by my blog!
Nice to meet you!!
I just became a follower of your blog!
Would love it if you followed me!
Love your craft/ribbon wall - very nice!!!
This is such a clever idea. I don't know if Little Charlie Dickens would tolerate pulling it over his head. I usually put Dickens in coats that have Velcro closures. I am inspired to see how I can adapt your idea. Thank you for sharing the sweater and for stopping by my post. Cherry Kay
ReplyDeleteaww...that is so cute! Who would have ever thought of it? You are very creative!
ReplyDeleteHi Chrissy!
ReplyDeleteThanks for joining my blog, I will come back soon to read yours, I just wanted to say, if you want to enter the give away, I didn't see any quotes, so you still got 1,5 hours to do so.... Would be fun if you win right?
Oh and your dog is so cute!
See you soon,
Maureen x
The sweater turned out so cute! I love it :)
ReplyDeleteIf only my husband would let me do this! I wanted to let you know, i've nominated you for the Stylish Blogger Award. Check it out at:http://mycreativeescapes.blogspot.com/2011/02/yippy-i-won-awardstylish-blogger-award.html
ReplyDelete